If you are unable to sign in to your account in the CURSORIUM system, follow the steps below. This guide is intended for students.
The guide is divided into two scenarios. Scenario A — if the system found you. Scenario B — if the system did not find you (you need to fill out an application).
Scenario A: User found
Scenario A: User found
1. Entering your email address
• In the email address field, enter your e-mail: students — personal email address; staff — corporate email address with the domain @volgmed.ru. After entering the address, click the «Check user» button.
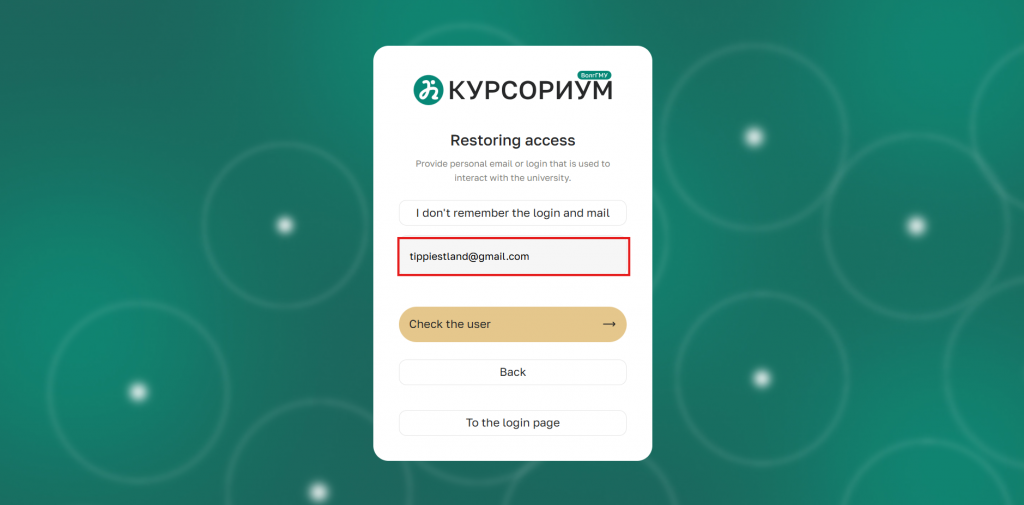
Figure 1 — Entering your email address
2. Confirmation of account availability
• Wait for the system to confirm that the account exists. Once the corresponding window appears, go to your mailbox.
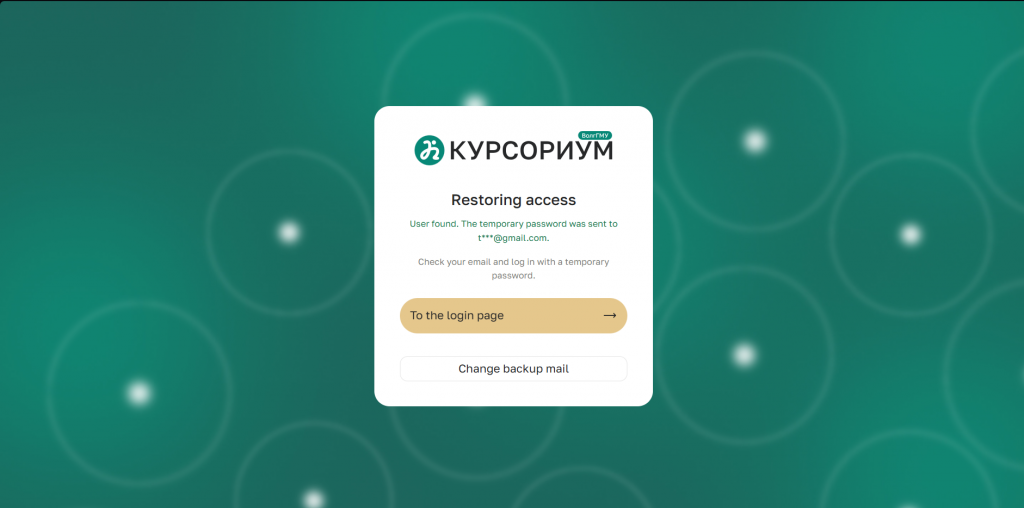
Figure 2 — Password sent confirmation window
3. Opening the email from the «ZaBot» bot
• In your mailbox, open the email sent by the «ZaBot» bot.
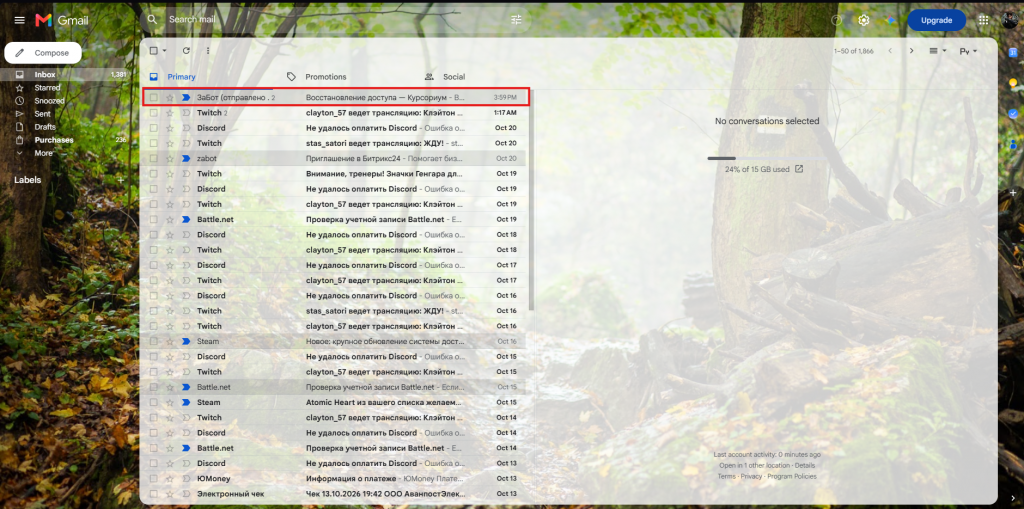
Figure 3 — Email from the «ZaBot» bot
4. Copying the temporary password
• Copy the temporary (one-time) password from the email. This password is valid for a single login; after a successful login, the system will require you to change it.
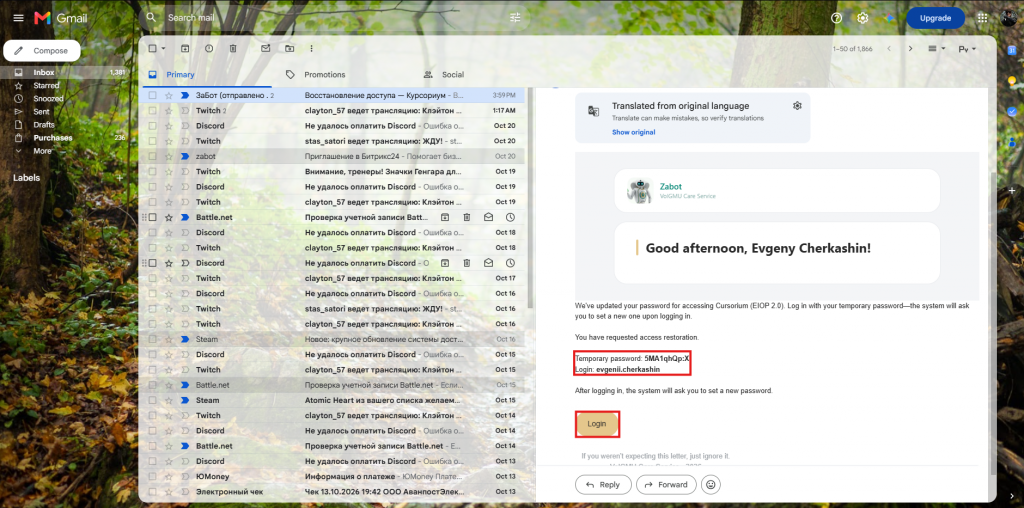
Figure 4 — Temporary password in the email
5. Returning to the sign-in page
• Return to the «Cursorium» website and click the «Go to sign-in page» button.
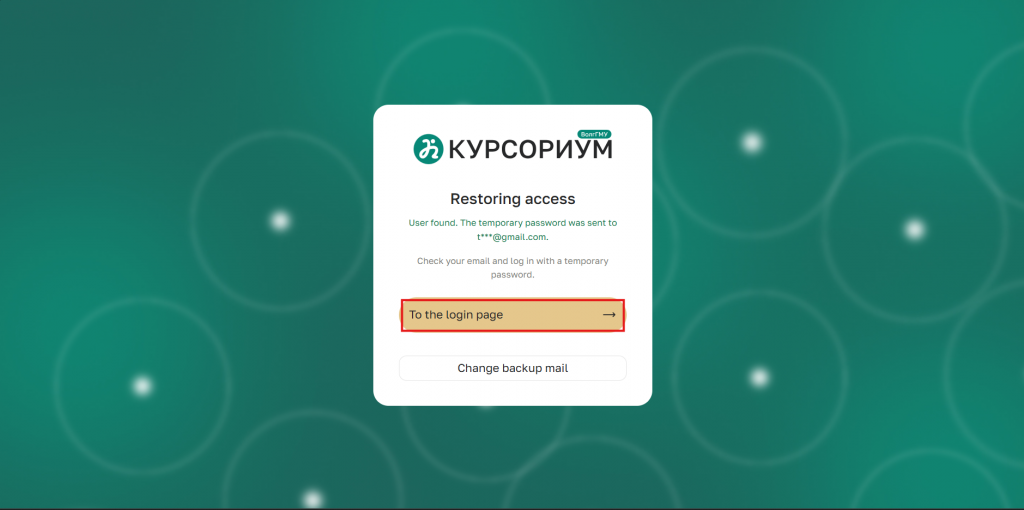
Figure 5 — «Go to sign-in page» button
6. Entering the temporary password
• In the login form, enter the one-time password you received in the password field and click the «Sign in» button.
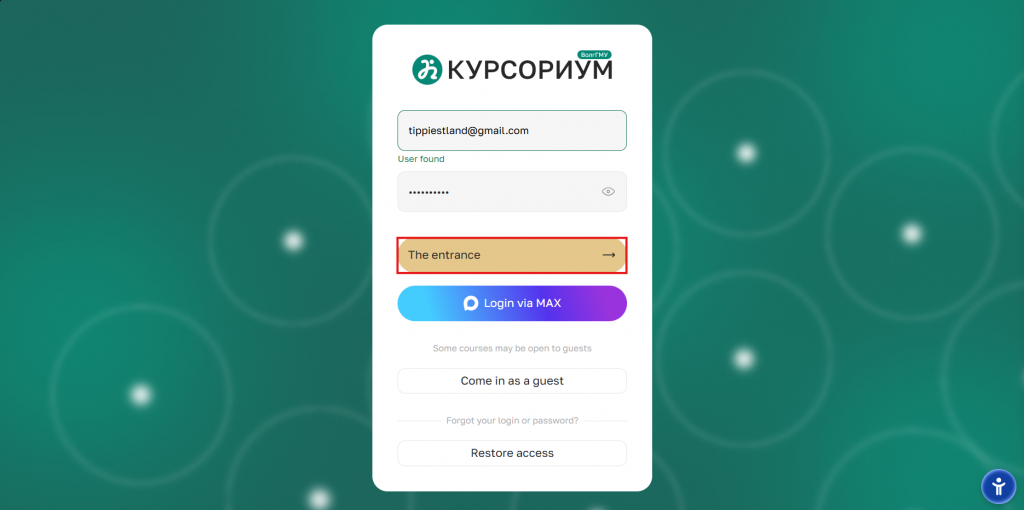
Figure 6 — Entering the temporary password
7. Changing the password
• On the password change page, perform the following steps:
- enter a new password in the next two fields, following the password complexity requirements provided by the system;
- click the «Save» button.
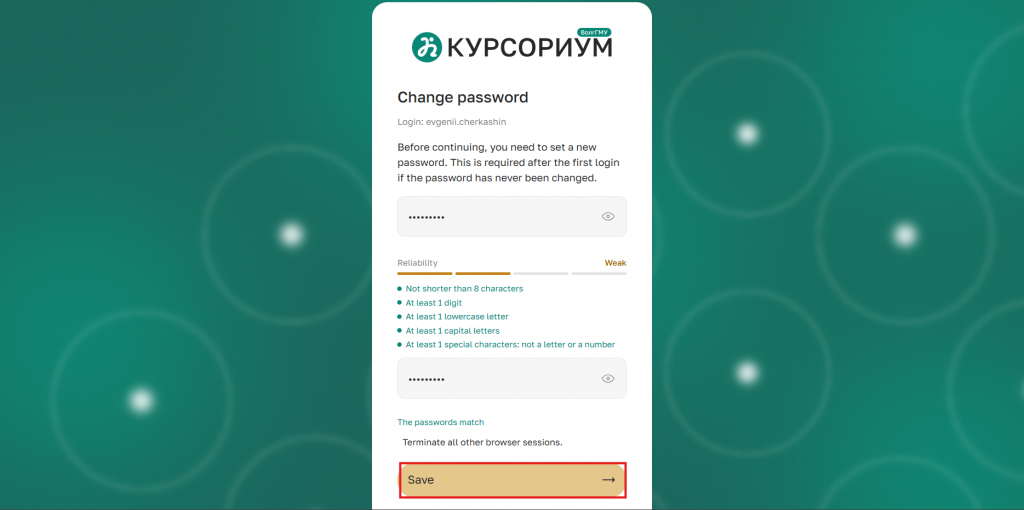
Figure 7 — Password change page
8. Authorization in the personal account
• After confirming the password change, you will be logged in to your account on the «Cursorium» platform. In the future, use the permanent password you created to log in.
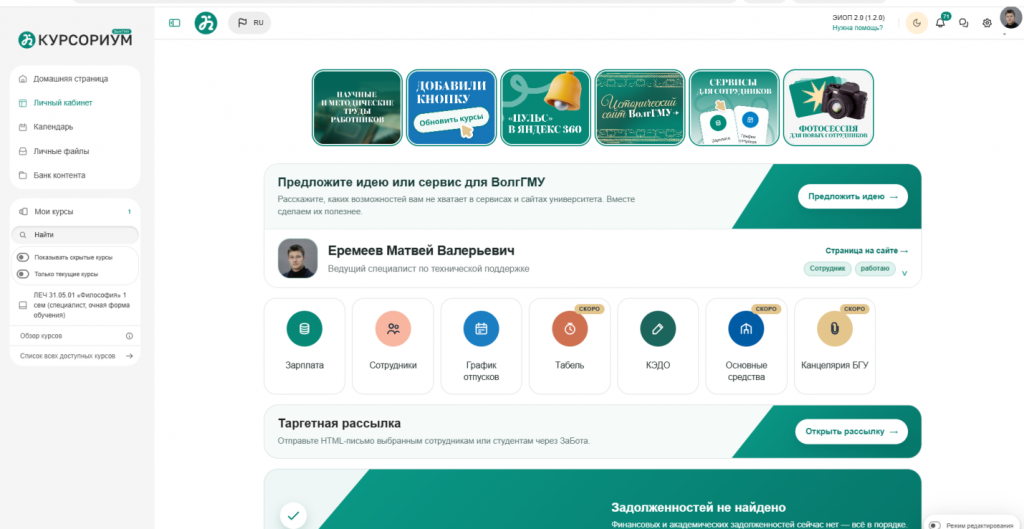
Figure 8 — Personal account «Cursorium»
Scenario B: User not found
Scenario B: User not found
1. Restoring access
• On the sign-in page, click the link «Restore access»;
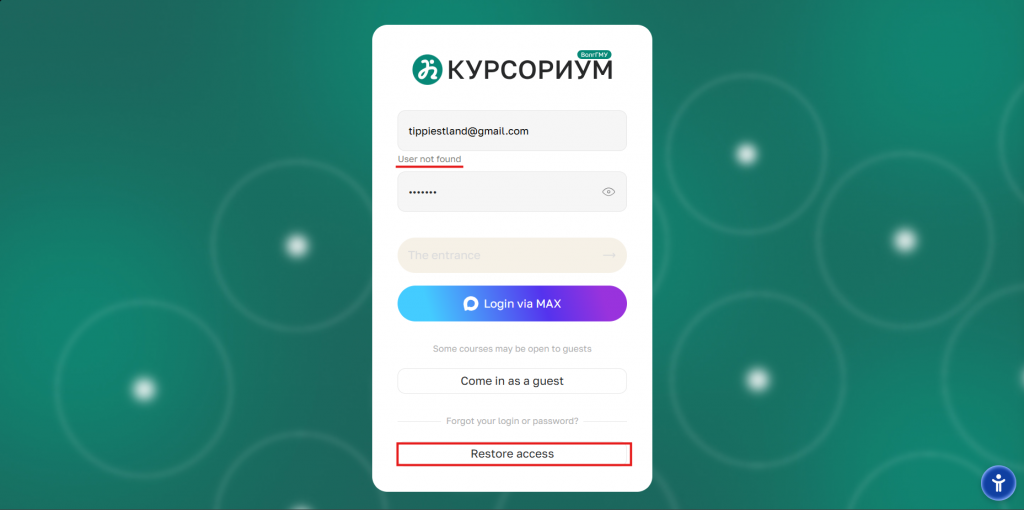
Figure 1 — Sign-in page with the «Restore access» link highlighted
2. Selecting a role
• In the window that appears, select the «Student» option;
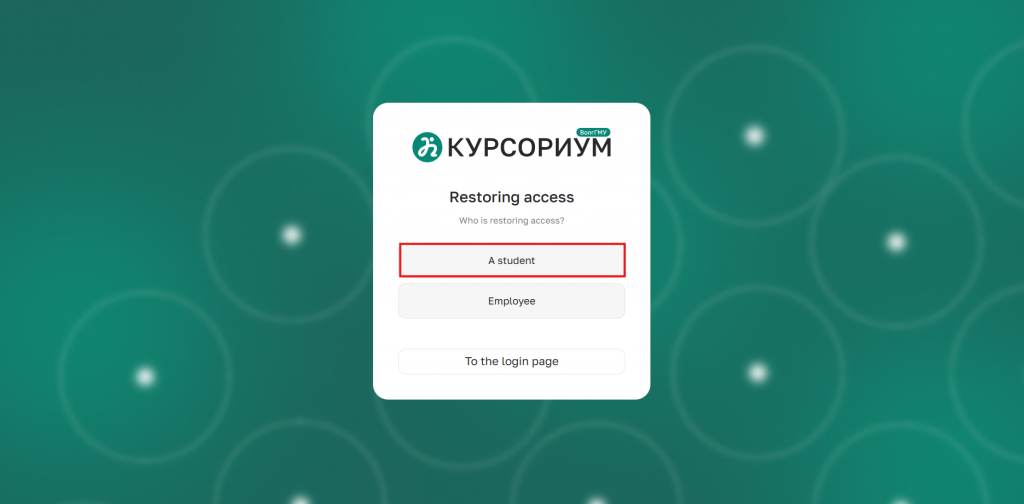
Figure 2 — Role selection window with the «Student» option
3. Entering your login or email
• Enter your login or email address in the corresponding field. Click the «Check user» button;
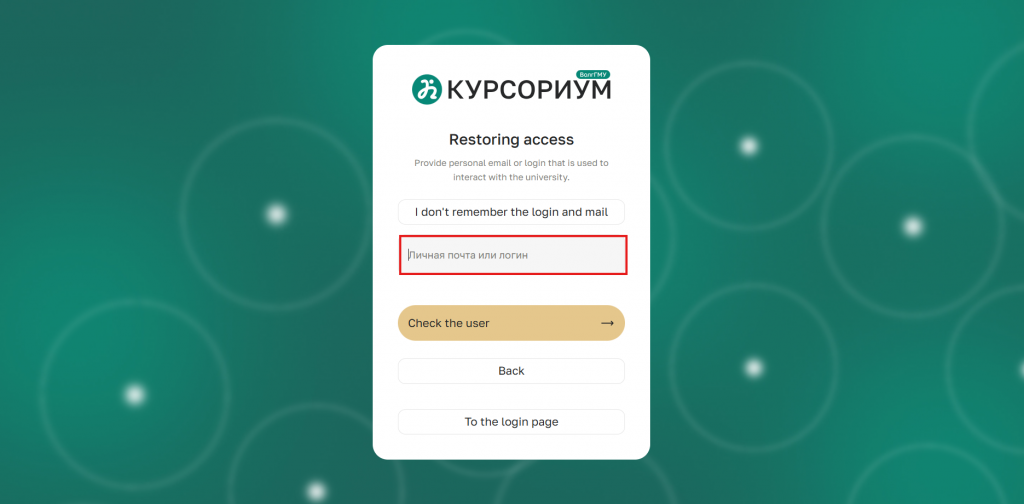
Figure 3 — Login/email input field and the «Check user» button
4. User not found
• If the system does not find a user with the specified data, click the link «I don't remember my login and email» to proceed to the application form;
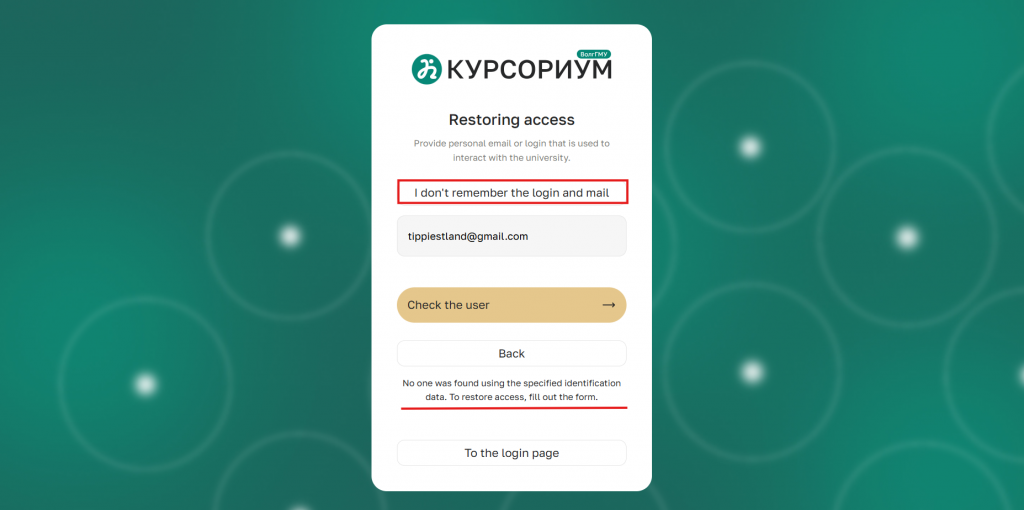
Figure 4 — The «I don't remember my login and email» link
5. Filling out the application
• Provide the following information on the page: full name, study group, student ID number, attach photos of yourself and your student ID, and specify a backup email address;
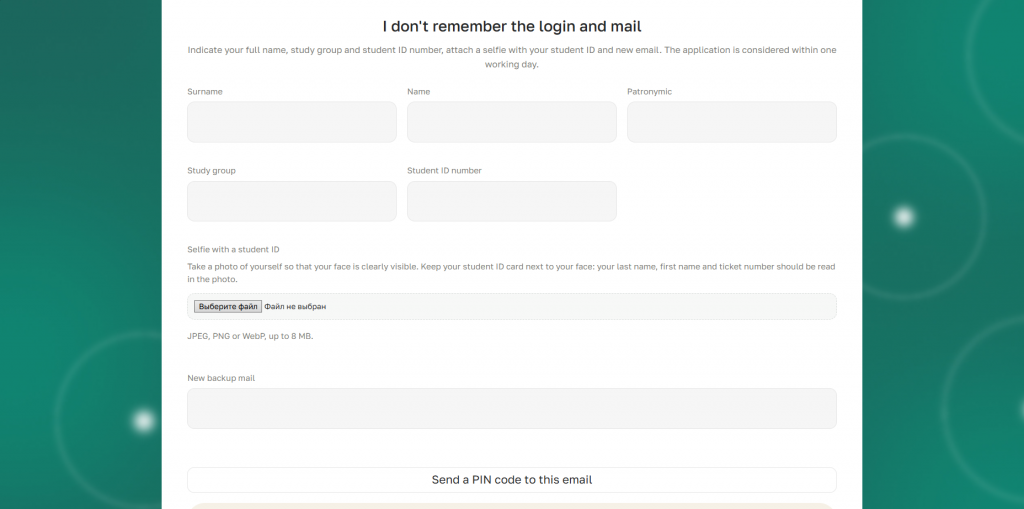
Figure 5 — Application form with fields for full name, study group, student ID number, photo, and backup email
6. Error «Student ID number not found»
• If you see the error «Student ID number not found», you need to contact your departmental dean's office. There, the specialists in the system must change the student ID number to the correct one. After that, you need to resubmit the access restoration request;
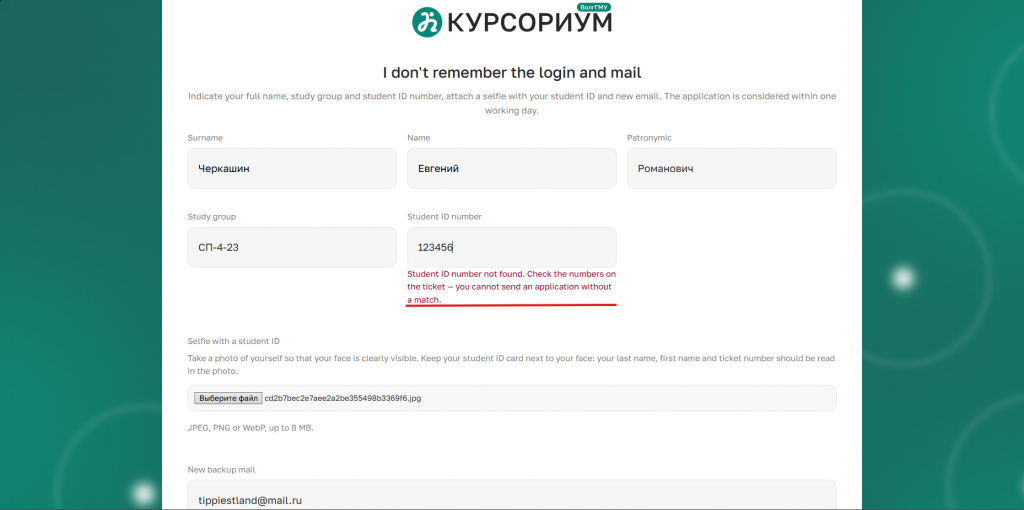
Figure 6 — The «Student ID number not found» error
7. Error «Failed to send»
• If you see the error «Failed to send. Please try again later»:
1. Check that the entered information is correct: the selfie with your student ID and the backup email address;
2. Contact your departmental dean's office so that specialists can check whether your email is entered in the 1C University PROF program.
.svg)